


The tufting gun is the essential tool to facilitate your practice of tufting. Different models exist allowing you to give free rein to your creative desires. This is why it is important not to choose your tufting gun blindly.
Expert or beginner, which tufting gun to choose?
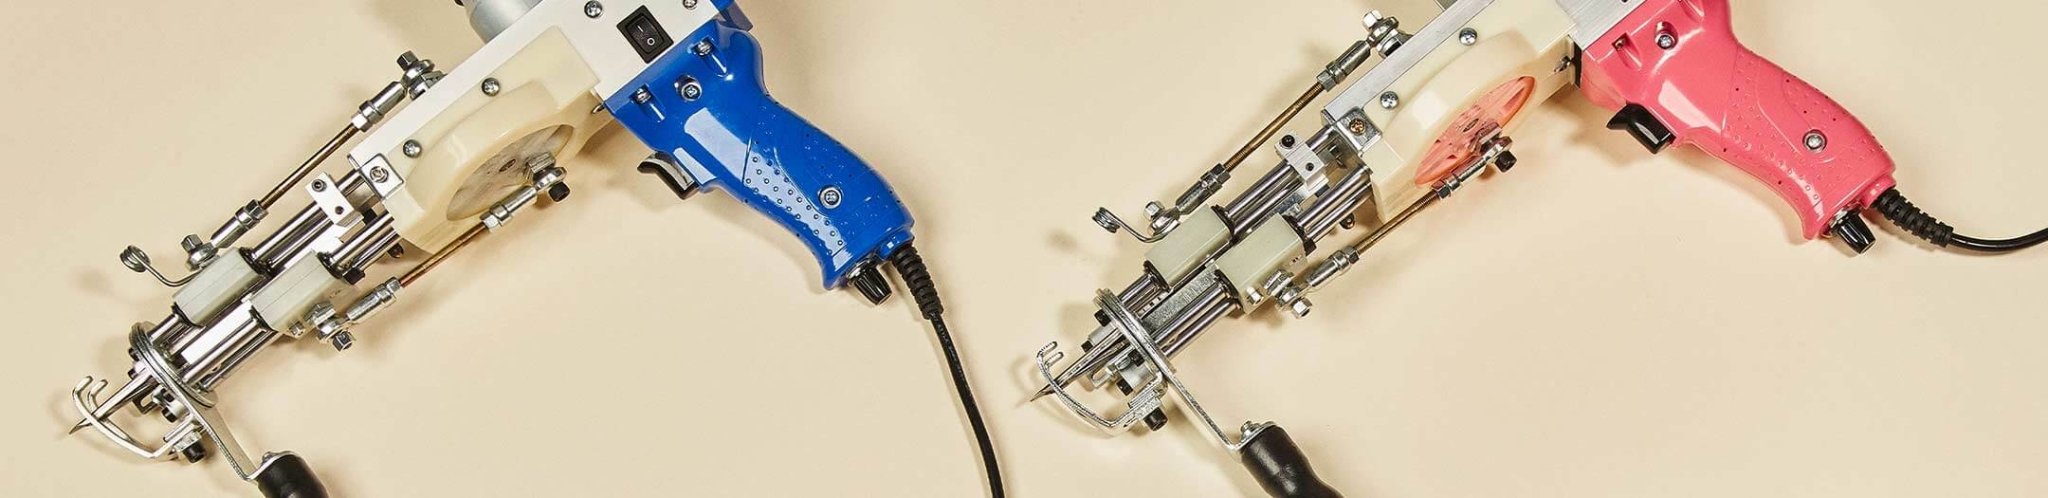
Whether you are a novice or more advanced in your practice, the choice of your tufting gun depends greatly on the rendering you want to obtain. Three excellent models stand out in the market.
The AK-I CUT tufting gun
It is to be used to obtain a CUT rendering. This tufting gun has built-in scissors that will allow you to make tufted creations with adjustable yarn height from 7 to 18 mm. Fast and light, you won't be able to do without it.
The tufting gun AK-II LOOP
The AK-II LOOP tufting gun is the perfect tool for beginners and professionals alike. Contrary to tufting gun AK-I CUT, the tufting gun AK-II LOOP does not have integrated scissors. You will need to manually cut the yarn each time you want to remove the tufting gun from the stretched fabric. Use a pair of scissors or a wire cutter for this . This tufting gun will allow you to create creations with an adjustable thread height of 3 to 13 mm.
The AKDUO LOOP and CUT tufting gun
The AKDUO CUT and LOOP tufting gun is a new generation 2-in-1 tufting gun. It will allow you to make both CUT and LOOP creations.
To better understand this quality professional tool, privileged online access will allow you to access all the necessary documentation. Do you prefer to be guided in real life? Then attend an initiation workshop!
FAQ - Tufting Gun
-
Tufting is primarily used to create rugs, but it can also be used to make tufted mirrors, cushions, textile paintings, and even clothing by adapting the techniques.
-
It all depends on the size and complexity of the design. For a beginner, a 60 cm x 60 cm rug takes about two days, including tufting, cutting, and finishing.
-
The choice of tufting gun depends on the type of finish you want to achieve: cut, loop or cut and loop.
• AK-1 CUT : Most popular model, perfect for beginners and professionals who want to make rugs in cut mode (fluffy effect).
• AK-V CUT : Improved version of the AK-1, with noise reduction and a built-in LED light, ideal for projects requiring increased precision.
• AK-II LOOP : Designed to create only continuous loops in loop mode for a textured effect.
• AK-DUO CUT & LOOP: Allows you to alternate between cut mode and loop mode , ideal for those who want to combine the two styles in the same project. -
- Cut mode : The machine cuts the thread with each press of the trigger, providing a "fluffy" and thick effect, like classic living room rugs.
- Loop mode : The machine leaves the thread in loops, creating a textured surface similar to punch needle.
-
• Manual tufting gun : Is very good for creating details with greater thread heights than those of electric tufting guns, allowing you to create reliefs or longer patterns.
• Electric Tufting Gun : Ideal for tufting rugs and any small, medium and large tufted project quickly. -
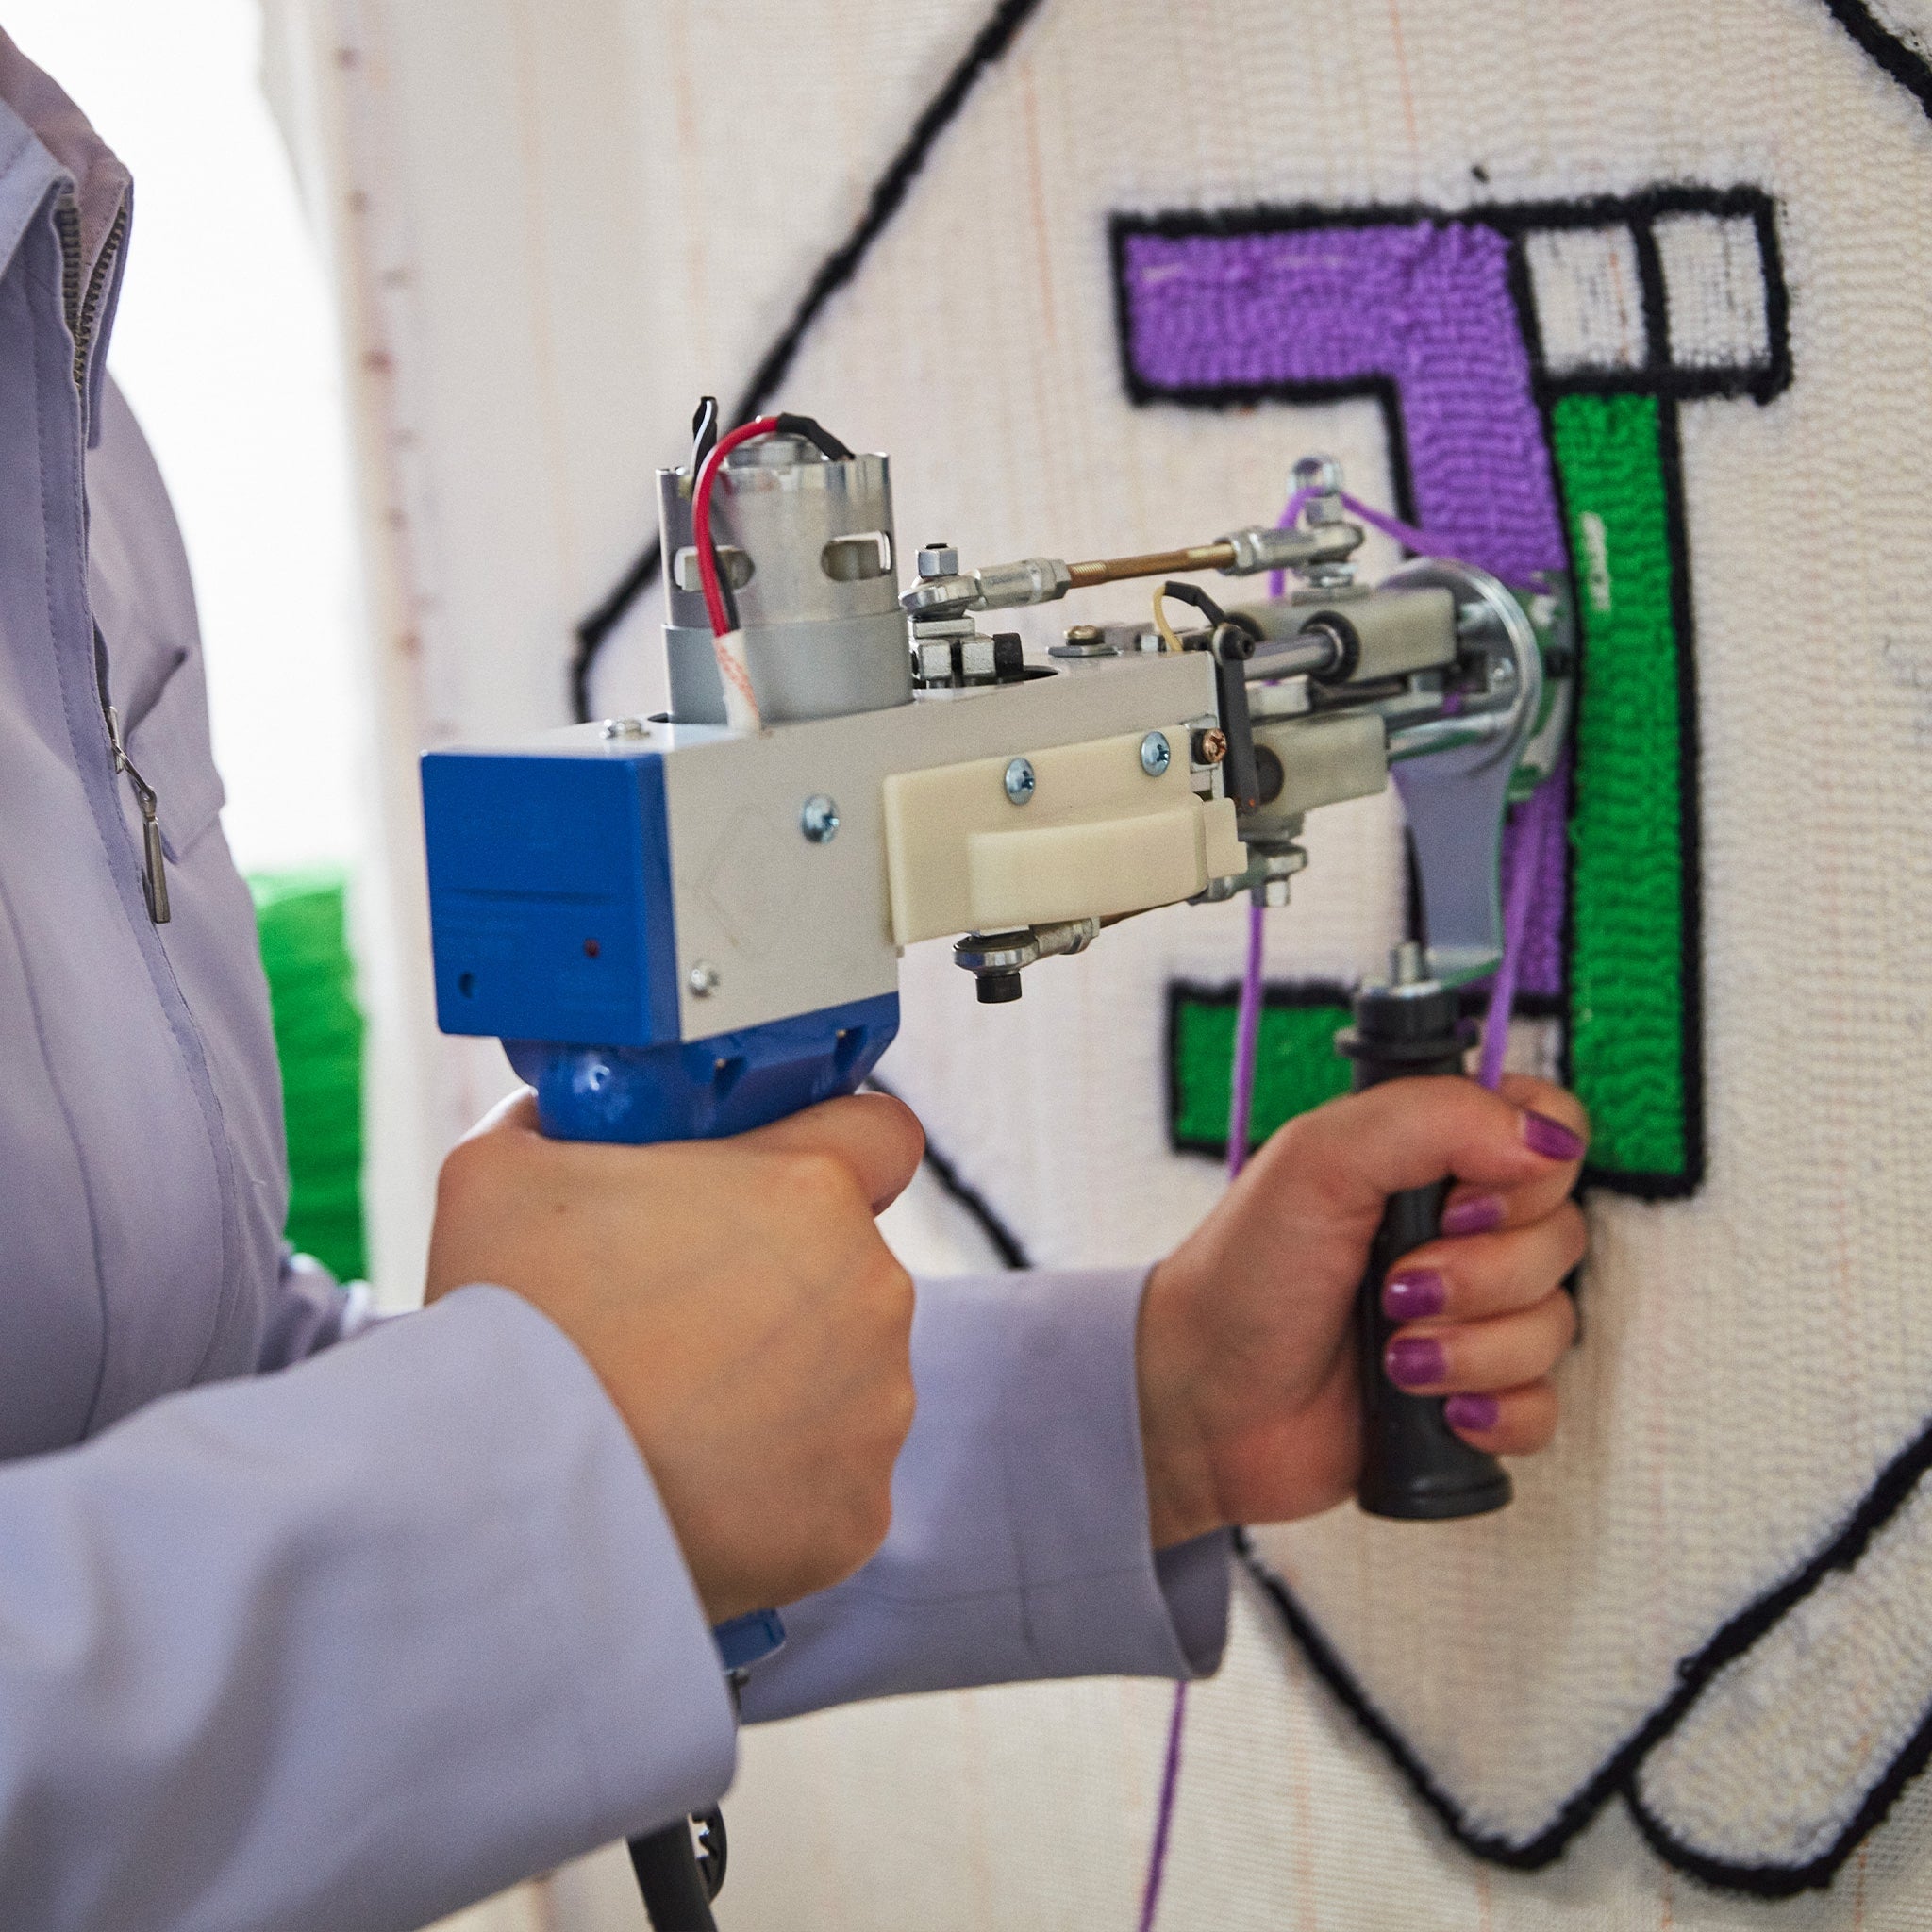
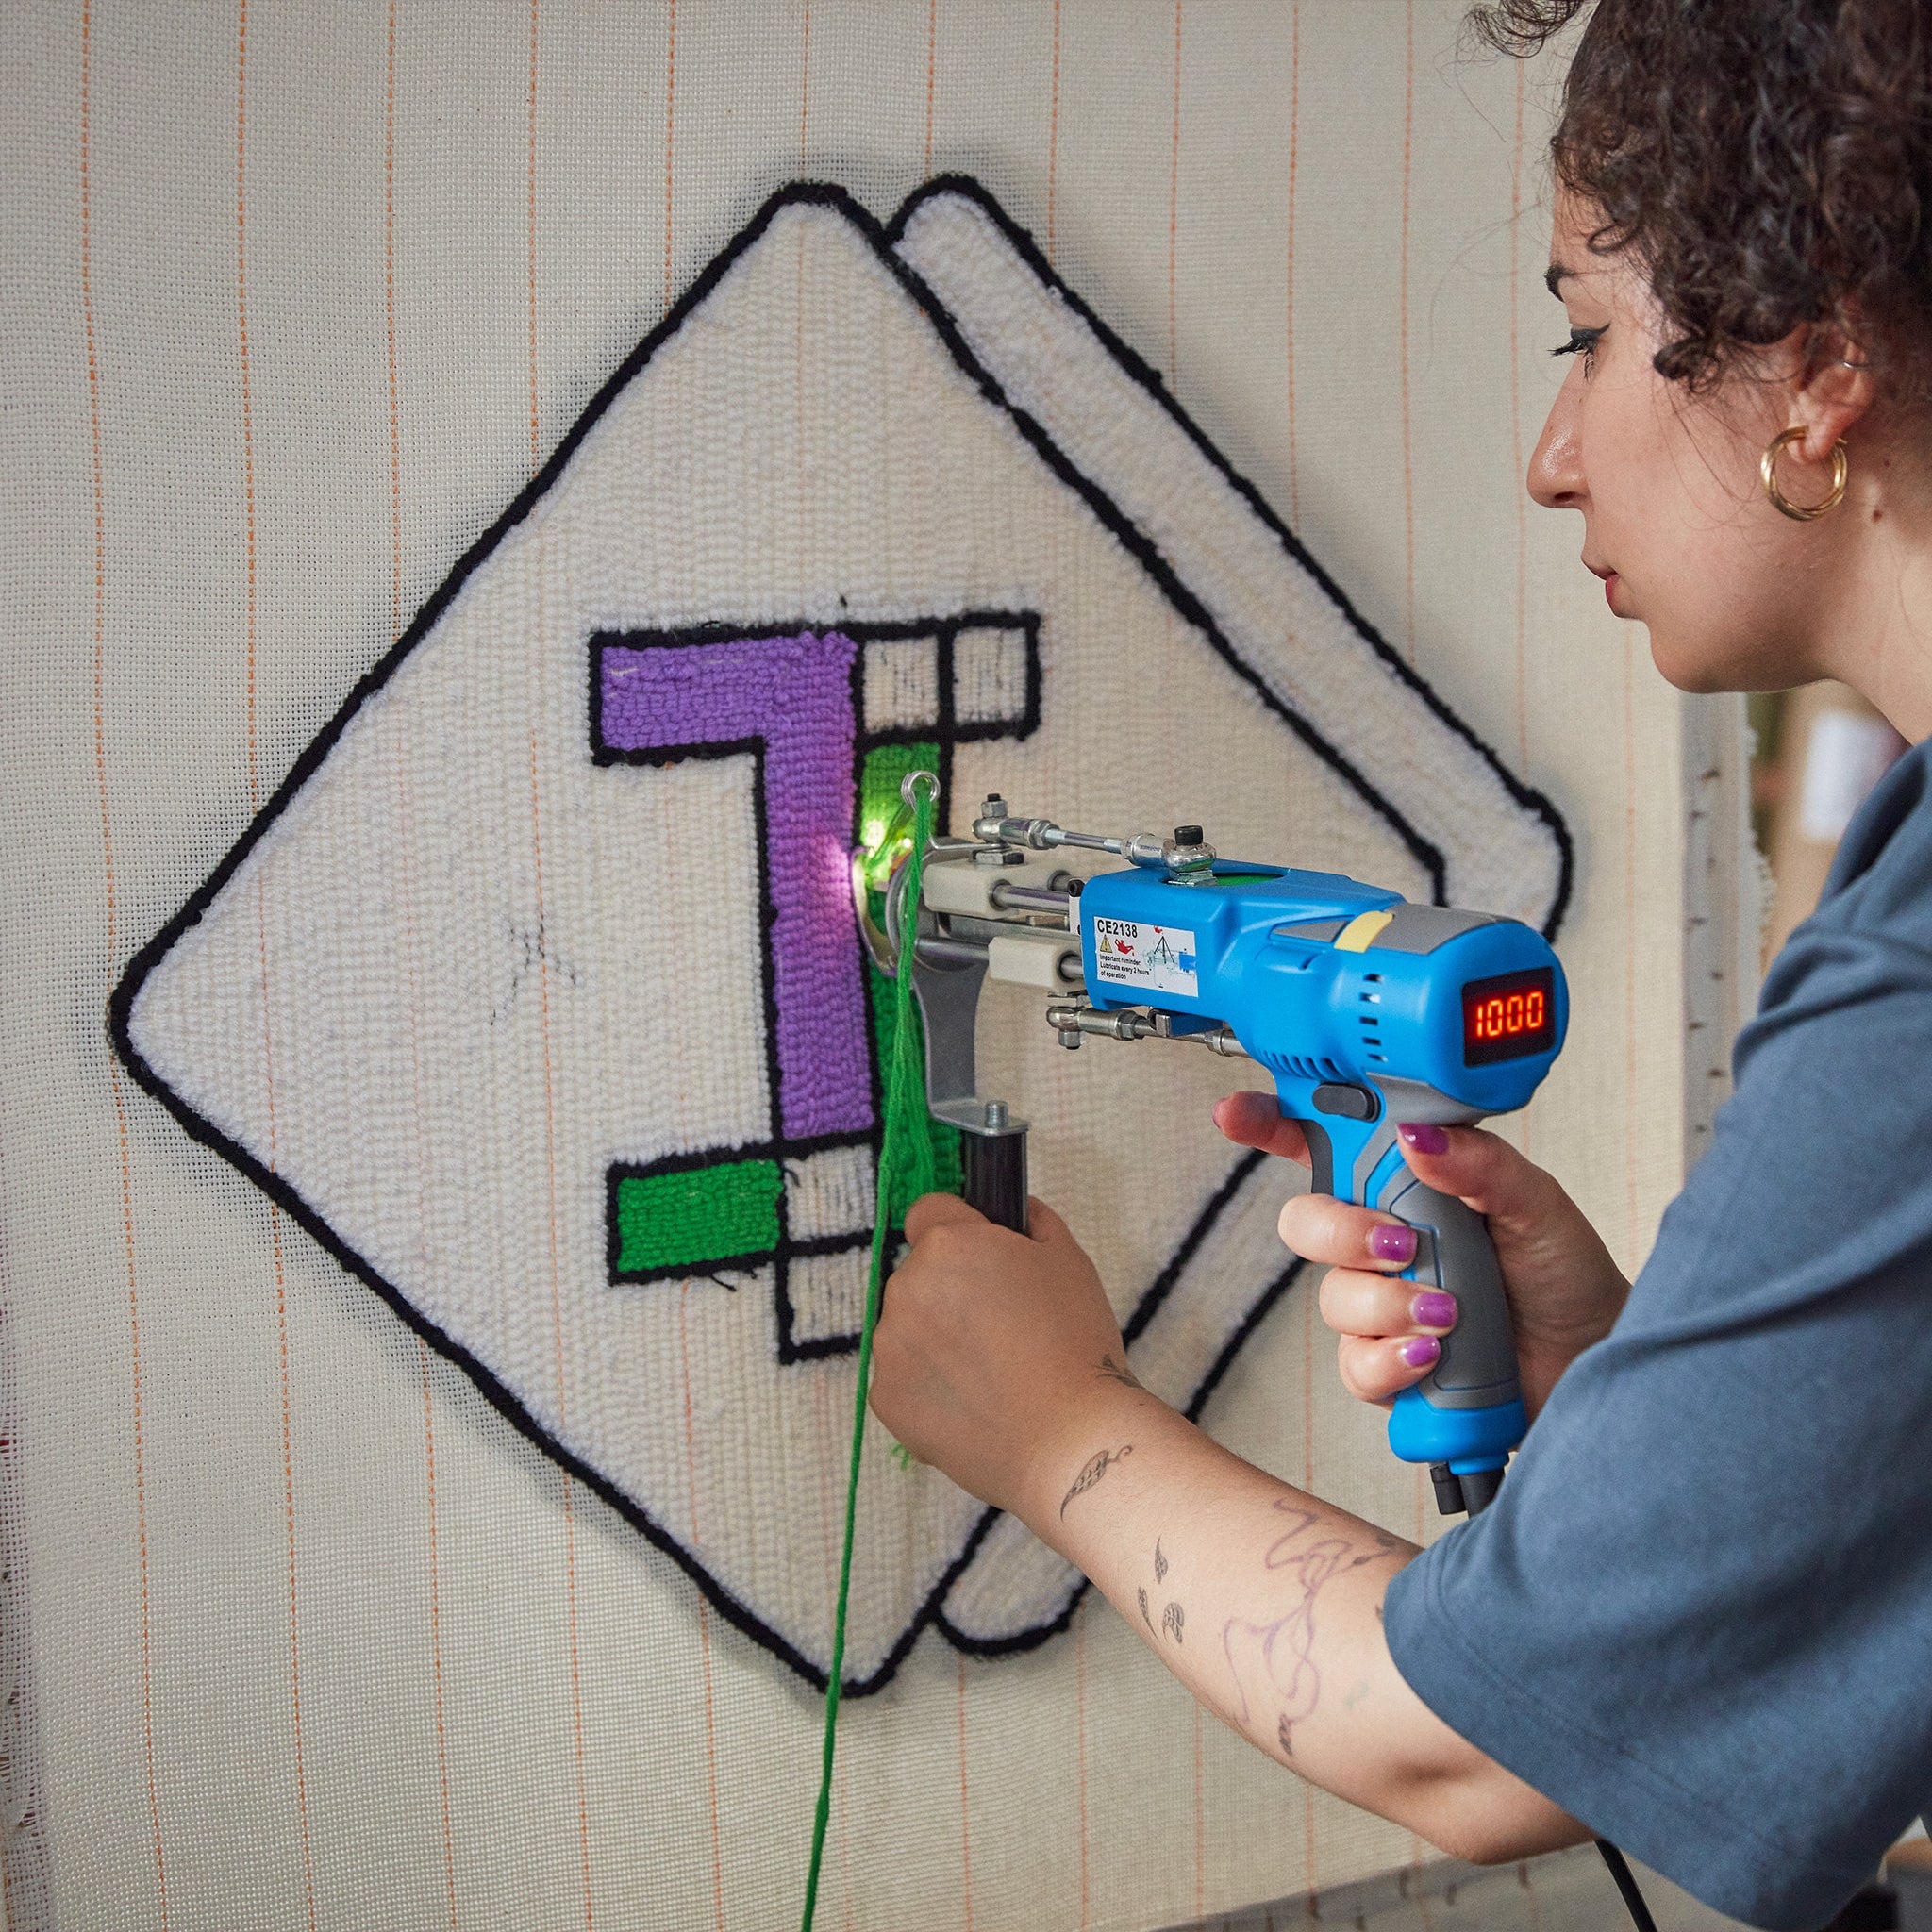
The tufting gun works primarily from the bottom up . It can only move in the direction the machine's foot is pointing. Here are some tips for using it properly:
• Straight lines : Move the machine slowly and smoothly, keeping constant pressure on the fabric.
• Horizontal lines : Tilt the tufting gun slightly so that the foot always follows the direction of movement.
• Curves : Make slow, gradual movements by gently rotating your wrist.
• Maintaining pressure : Make sure that the foot of the tufting gun always remains in good contact with the canvas to avoid holes. -
It is recommended to set the speed to the lowest setting, especially at the beginning, because even then, it will still feel fast. Once you are comfortable with the tufting gun, you can increase the speed slightly, but never exceed half the setting on the speed dial.
-
The spacing between tufted rows depends on the yarn used. Too tight a spacing will make the rug too dense, while too wide a spacing will leave visible holes. We recommend experimenting with different spacings to achieve the desired look.
-
You will need a needle threader to insert the thread into the tufting gun needle.
Steps:
1. Insert the needle threader into the tufting gun needle (from bottom to top).
2. Pass the thread through the end of the needle threader.
3. Pull down to pass the wire through. -
- Check the thread tension and make sure it is not caught under your feet or on the frame.
- Make sure the thread follows the needle path correctly.
- Check that the spool is properly installed and unwinds the line without resistance.
-
- Never touch the moving metal part.
- Do not put your fingers near the needle.
- Tie your hair up and avoid wearing jewelry
-
To ensure the longevity of your tufting gun, clean it after each tufting session. Remove any trapped wool fibers using a brush and a can of compressed air. For more details, see our complete guide to tufting gun maintenance.
-
A well-maintained tufting gun can last for several years. It is important to regularly clean out stuck fibers and oil the moving parts.
-
If the cut becomes uneven or the clipper catches the fibers, it is time to replace the blade to regain a smooth and precise cut.
-
A bobbin winder allows the thread to be wound evenly onto a bobbin, making it easier to use with a tufting gun by avoiding knots and ensuring even tension.